
Introduction
For many years, the IBM i (previously AS/400) has been the powerful base for important business programs. It is known for being very steady and dependable. However, how we usually develop on IBM i can feel a bit old-fashioned compared to today’s ways.
That is where BOB Workspace comes in. It is a new tool that changes how you develop and set up programs on IBM i. It makes everything quicker, more flexible, and fits perfectly with modern methodologies like DevOps.
Getting Started with BOB
1. Verify Pre-requisites and Configurations: Make sure you have all the necessary tools and settings installed and set up. If anything is missing, please check our last blog post for details on what you need.
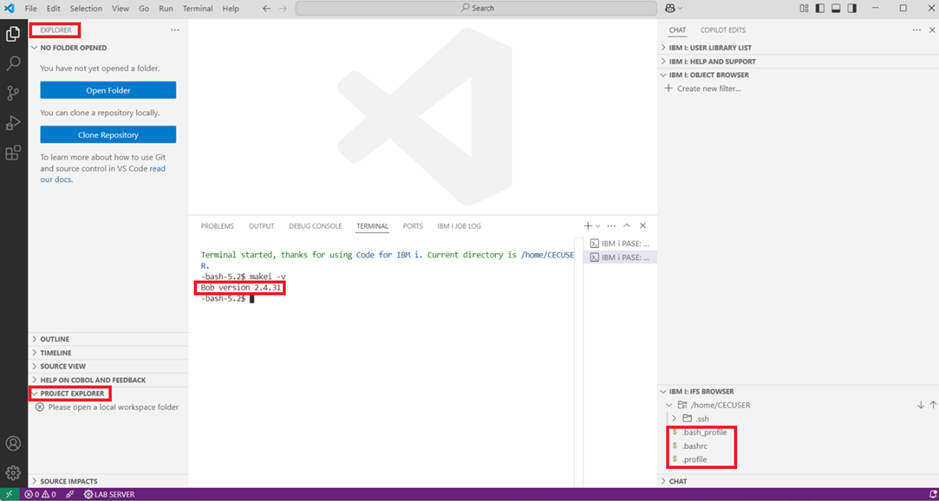
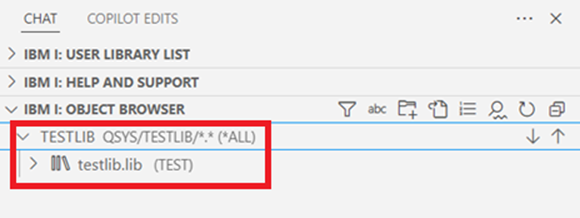
2. Configure Libraries in Object Browser: Create a new filter to browse the objects. You can refer to our previous blog by clicking on the link provided. Blog Link.
3. Create and Open a Folder Within Project Explorer: Create a folder and open it in the workspace.
- Click on the “Open Folder” icon to open a folder (or a workspace).
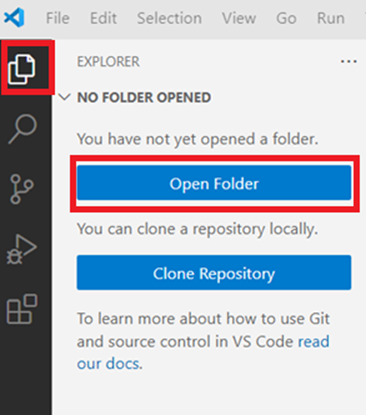
- When you click Open Folder, a new window will appear. Here, you can either choose an existing folder or create and open a new one.
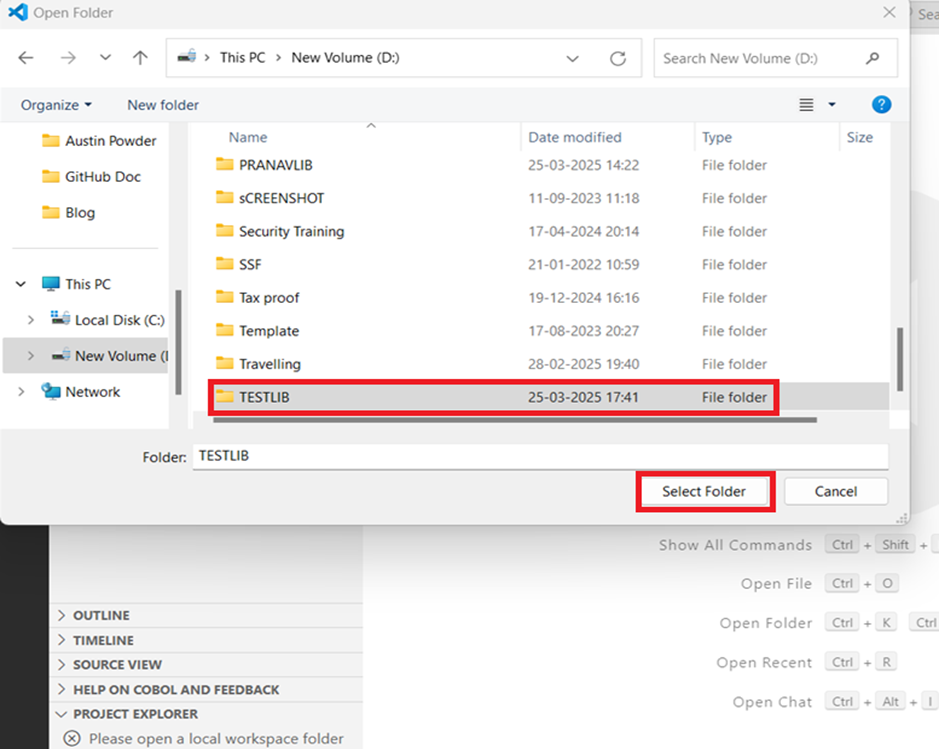
- Next, click “Select Folder” to open it in Explorer. A message asking, “Do you trust the authors of the files in this folder?” will pop up. Choose “Yes, I Trust the Author”. Your chosen folder will then show up in Explorer.
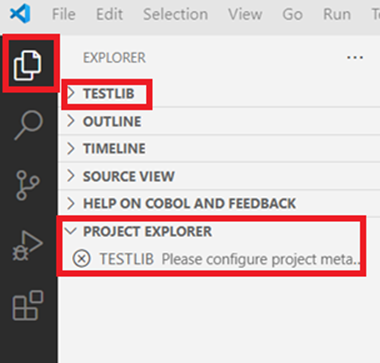
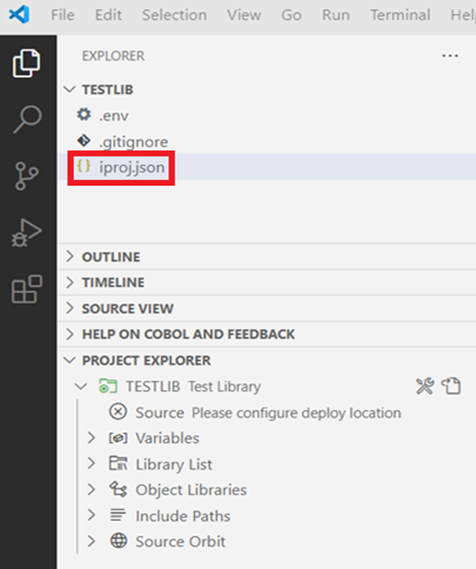
4. Configure Project Metadata Within Project Explorer: In order for the workspace folder to be treated as an IBM i project, it must contain an iproj.json file.
This configuration can be done by the project explorer using the Create iproj.json action. This will prompt you to enter a description for the project and then create the file.

- Once you finish the setup, your workspace folder will be ready for you to start developing.
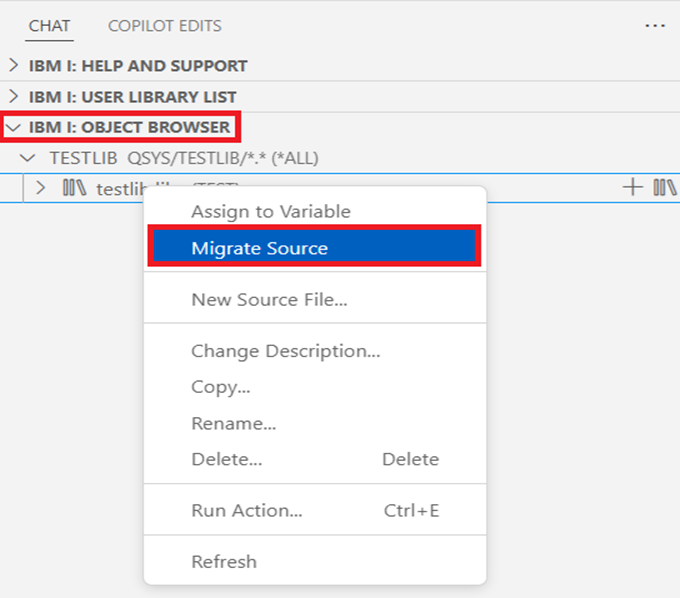
5. Migrate Source: The migrate source process downloads and migrates the source code locally in your workspace folder (project) from source physical files in QSYS, so that you can begin with local development.
You can browse the library containing source physical files using “IBM i: Object Browser.” Once you found the desired library, right click and use the “Migrate Source” action.
- After you click “Migrate Source”, a form will open in the editor for you to set up the migration.
6. Configure Settings
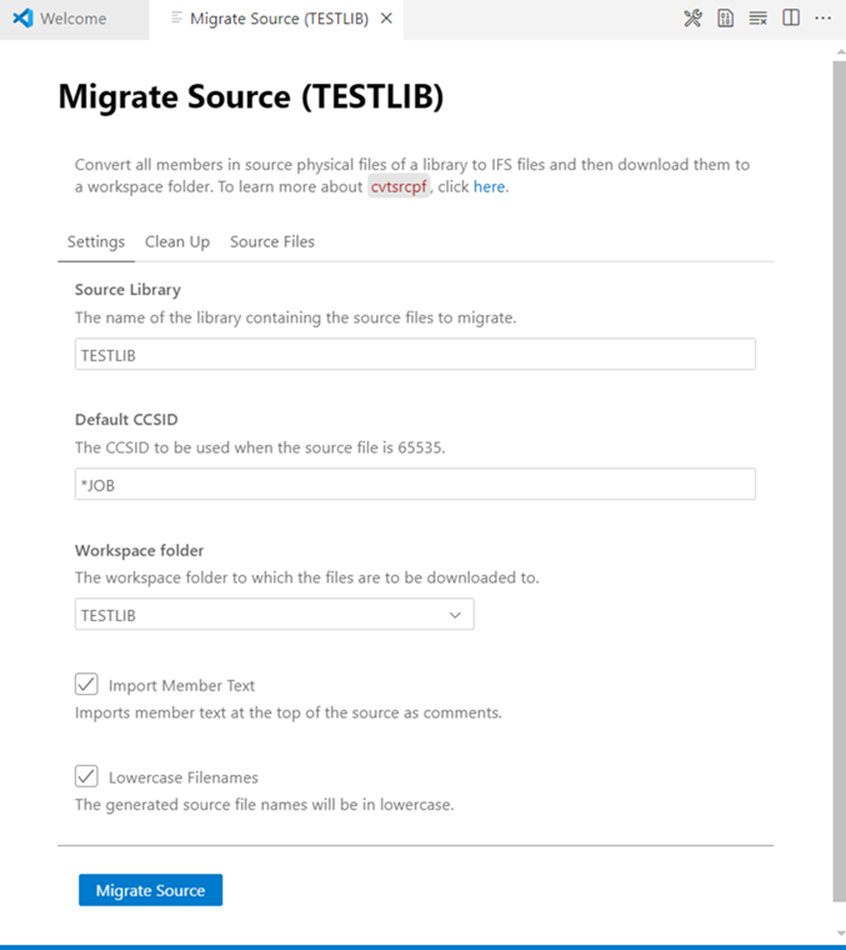
- The source library and the workspace folder (where the files will be downloaded) will already be filled in for you.
- CCSID: The CCSID is required by the compiler when creating the target object.
- Import Member Text: This option is given to import member text as a comment at the top of the source code.
- Lowercase Filenames: Generates source file name in lower case.
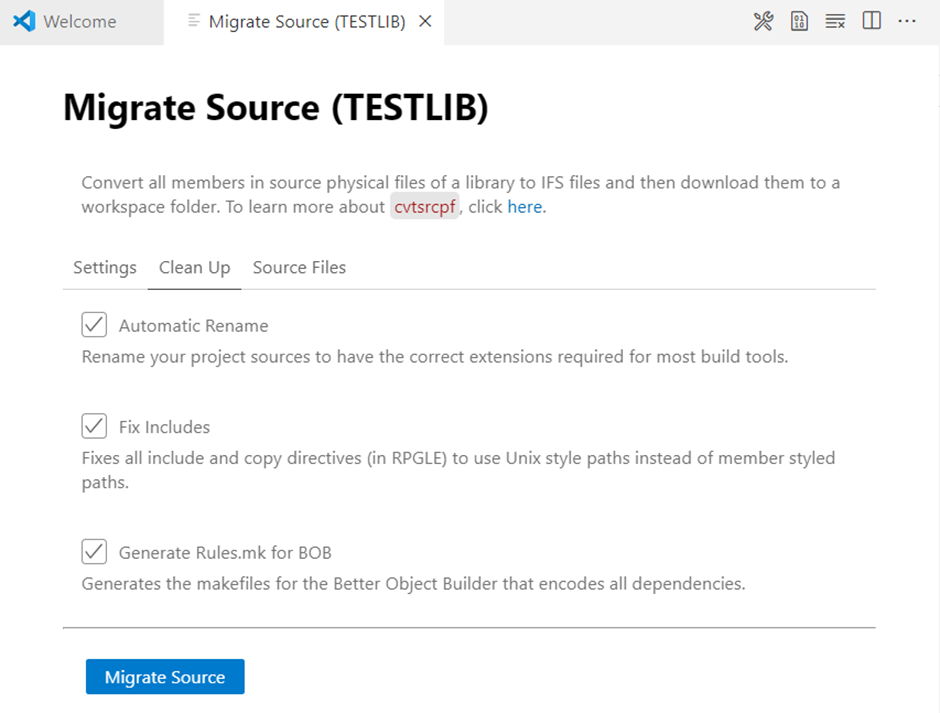
7. Enable Clean up: As part of this migration, you can also use another extension called Source Orbit. It helps clean up the code once it is moved over.
This extension automatically renames the migrated source, (in order to have the correct extensions required for most build tools), fixes all include/copy directives to use Unix style paths (instead of member styled paths), and generates the Rules.mk files used by Bob.
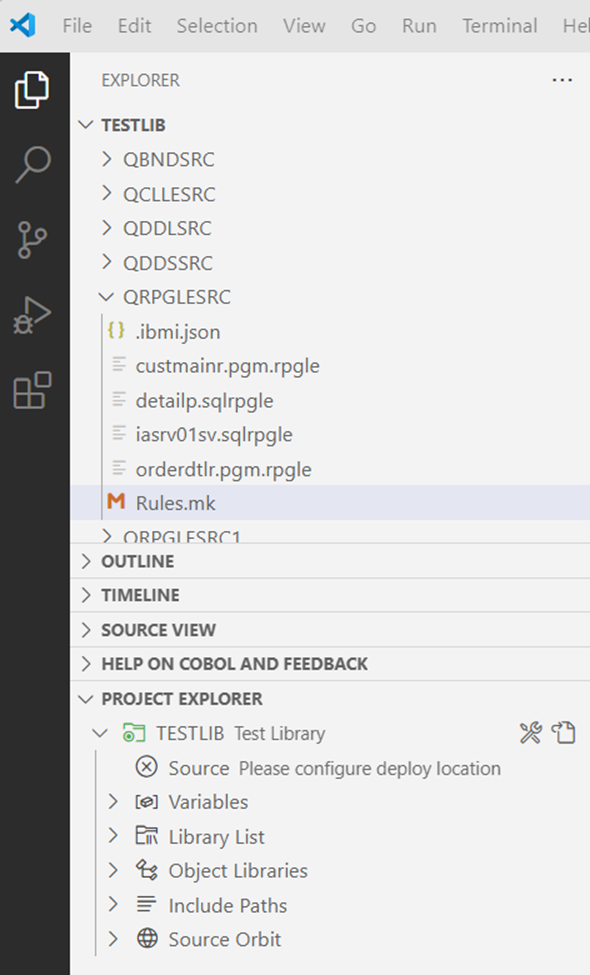
8. Select Source Files: Pick the source physical files in the library that you want to move. After selecting them, click the Migrate Source button at the bottom to start the process.

- Once you click the Migrate Source button, all members from the library’s source files will download to your local workspace.
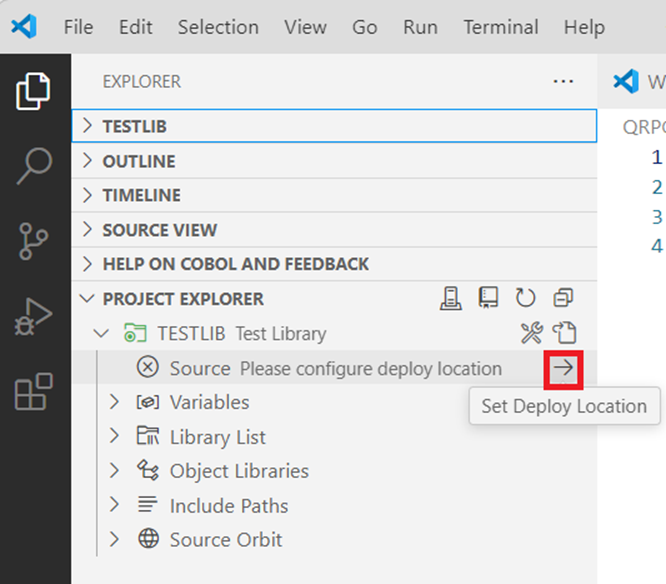
9. Set The Deploy Location: This sets the location to deploy your local source file to the IFS location, where you will be running your build and compiling.
To set the project’s deploy location, use the Set Deploy Location action on the Source heading. The suggested deploy location is:
/home/<user>/builds/<project_name>
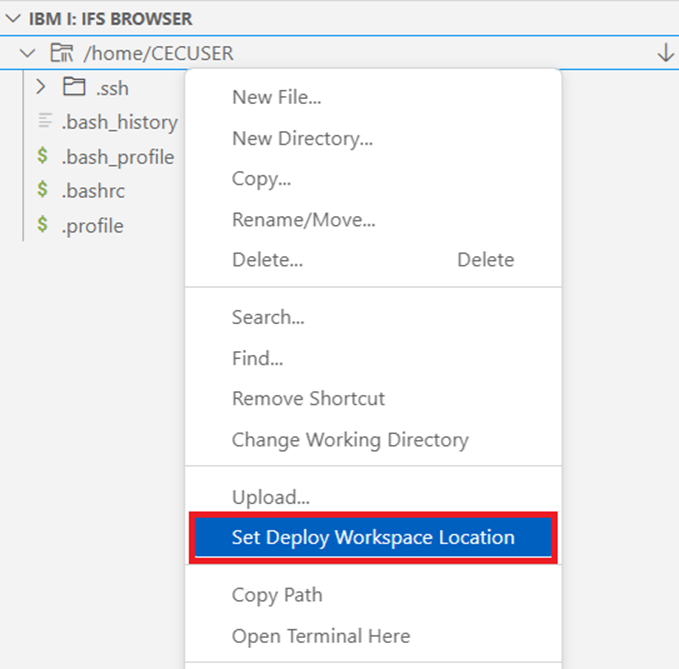
- You can also set the deployment location directly from the IFS Browser. Just create an IFS shortcut, then right-click it and choose “Set Deploy Workspace Location.”
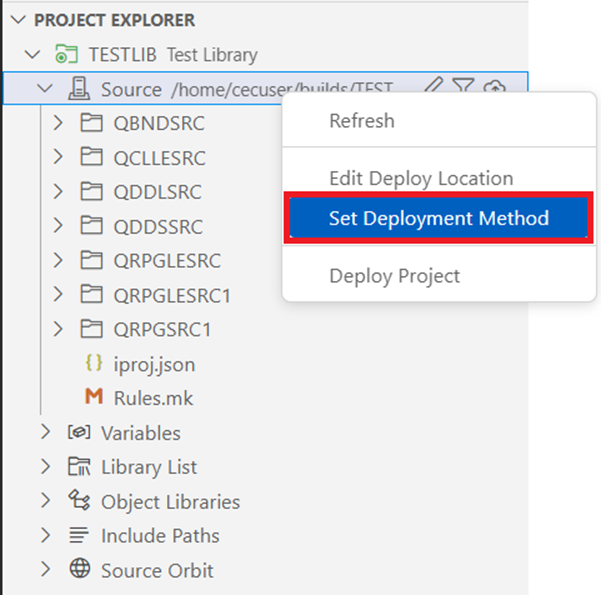
10. Set the Deployment Method: Once you have set the deployment location, you can then choose the method for deploying your project using “Set Deployment Method”.
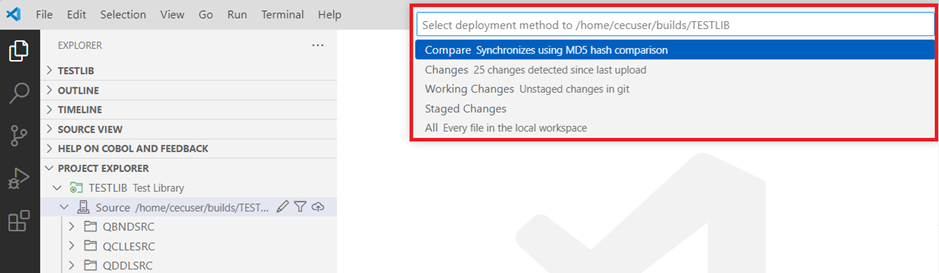
11. Understanding Deployment Options:
- Compare: This method compares files using an MD5 hash. It only uploads files that have changed. Any files in the deploy location that are not in your local workspace will be deleted, meaning it is the only way to completely ensure the deployment location. Your project will have the exact same content after deployment.
- Changes: This method uploads only the files that have changed since the last upload. However, if you close and reopen your workspace, this method will not remember which files were changed before.
- Working Changes: This method only works if your project is connected to a Git repository. It will only upload files that have changed since your last commit and have not been staged yet.
- Staged Changes: The same as the Working Changes method, but only uploads staged and indexed files.
- All: This method will upload all files in the local project.
12. Deploy Project: To begin deploying, go to the Source heading and use the Deploy Project action. This will upload your project’s local files to the deployment location, using the method you have currently set.
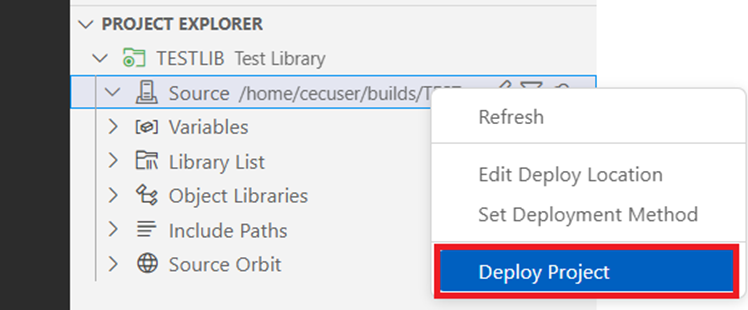
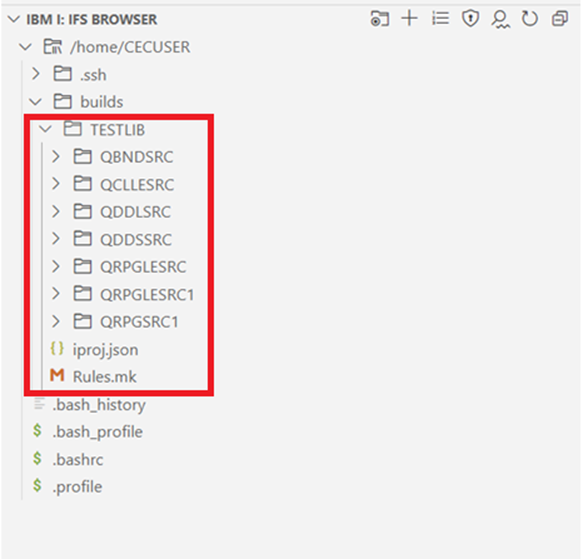
- Once a project is deployed, you can see the source files by selecting the IFS Object Browser.
Conclusion
The IBM i platform continues to be a powerhouse for business-critical applications. By embracing modern development practices through BOB Workspace and its modern deployment capabilities, you can revitalize your IBM i workflow, making it more efficient, collaborative, and aligned with the demands of today’s agile development landscape. It is not just about updating tools; it is about empowering your developers and accelerating your business.

")
